Tuesday 20 January 2009

Joe Bloggs


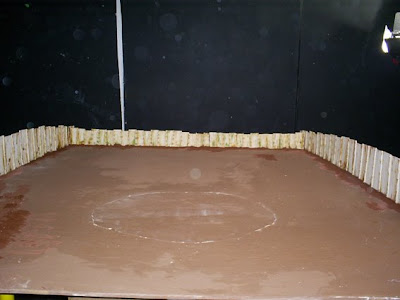
These are the final set shots, im really happy with the way the sets looking now, i feel if i keep touching it up like i have been, im going to ruin it, so im pleased to leave it the way it is, got a lovely glossy shine for the surface emphasizing a wet mud, like a sorta SLOP. Also the detail of dark shades and light are ones which you'll actually find on a site, the light tints symbolising CLAY mixing with mud, which does occur, and the dark tints equalling the darker dirtier mud which you come across whilst on a building site...i build them all the time...ayoooo

Paint by Numbers


These are all the photo's of the set with the base coat down, with a slight fade toward the back to get that "field of depth" aspect im after...looking more like NUTELLA though, yummmm

Thursday 15 January 2009

Set-tle Down


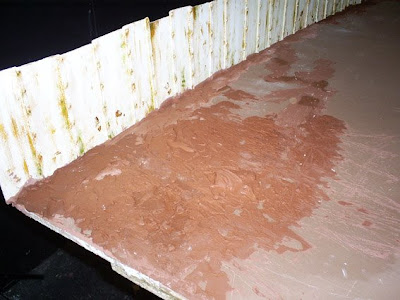
So, here's the progress i made yestarday, i strenghted the plaster for the fence, then i tried to get the top and final layer right for that un-even muddy surface look im after...these be the pics.

Today i finished the set's final layer, I'll post up pics of the set now, later on, im just adding more deets to really get ot lookin top notch!

Tuesday 13 January 2009

Animatic


DOUGIE ANIMATIC from Drew Roper on Vimeo.

Fence Me


So these be the pic's after today's progress with my set at uni...Thanks to DAV for helping me out, man, was solid...but the sets really starting to take shape....
I've painted the fence panels magnolia/creme for that 50's look, but then, made it messy as a kid eating spaggetti, to give it that buildery look, then for further detail, the orangey/brown colour to add that RUSTY value to it to emphasize it's been there awhile and its metaly-ie mechanical...oh yeh then the bits of green dotted around for the mould/moss feel...im really pleased with the outcome!


Prop Prop!


So here's some of the props in colour which i'm going to MAKE and use. First;
Mini (hand) spade; for those digging introquette moments. Again, sticking to the mechanical style, i've chosen to colour it like a classic 50's car, sky/pastel blue! Think it looks cool.
Lunchbox; Here i've made the lunchbox seem like a toolbox aswell, which i like, old, rusty, tatty box which was probably his DAD's old one or somet. This was to keep it in with the mechanical aesthetic, hence toolbox look. The colour again, from a 1950's van. ziiiing
Toolbox; This is a classic, i remember me grandad's having these badboys around the joint, tremendously old-fashioned, alot back in the day were made from wood, so i chose a standard silvery/chrome battered colour to uses for the mechanical aesthetic, main colour inspiration are the car badges and some of the 50's kitcar colours, pure aluminium/chrome esque.


Sunday 11 January 2009

Prop-ella. ella, ella, a a a a..


These are the prop designs, for the rake, adjustable rake, and big old school 50's esque. shovel...


(We are the...)MOD's


So, here's some lil thumbs of my first attempt at modelling Dougie's head went...been meaning to put this up for weeks, but i was waiting for the body to be ready....but i still ay done it yet, its been taking ages...so just thought id show you these...this isnt the proper head obviously, he'll have a completely seperate jaw and the hair and that will look much better, i hope


Saturday 10 January 2009


Here's some colour tests for the RODENT's HOME, which, is the "missing" pipe, oh those cheeky rodents!!
Still keeping the mechanical look with the bolts for connection purposes, and the 50's theme with the lovely pastel blue colour above...the other colours, just a nice, rusty"been under ground for ages" looking pipe....